Logic Pro Mix Prep
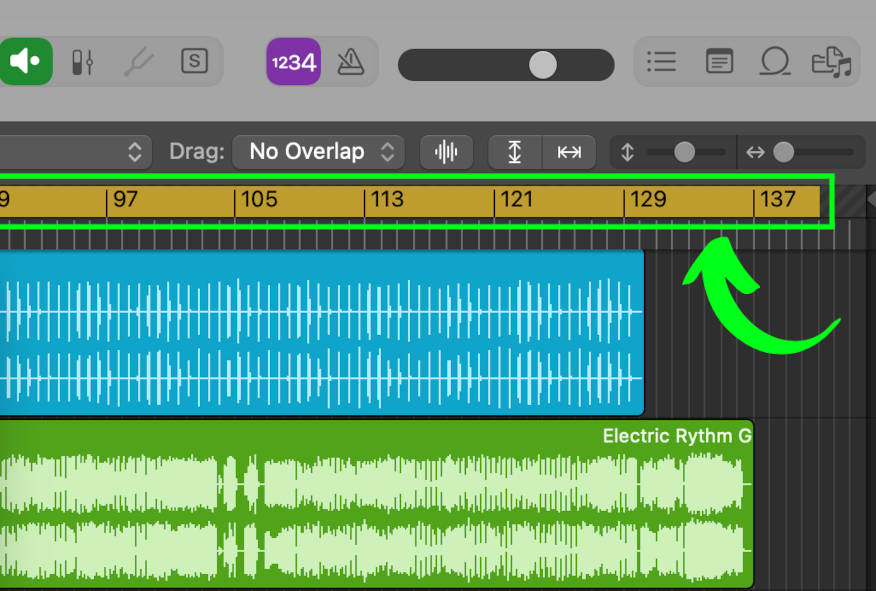
Step 1: Set the cycle range to the length of the song
Step 2: In the top menu click File > Export > All Tracks as Audio Files…
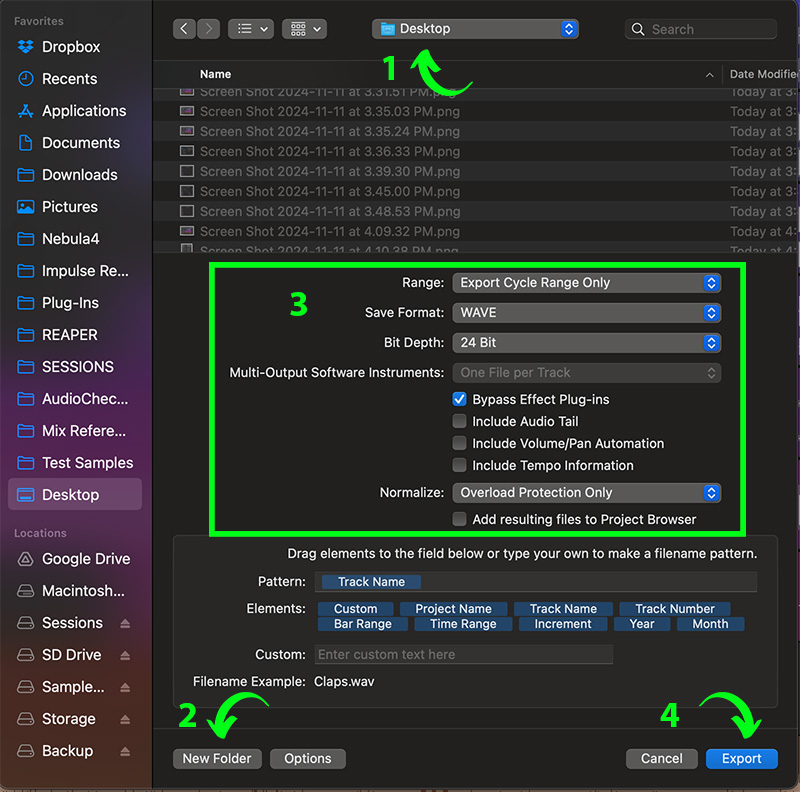
- In the popup window, navigate to the Desktop.
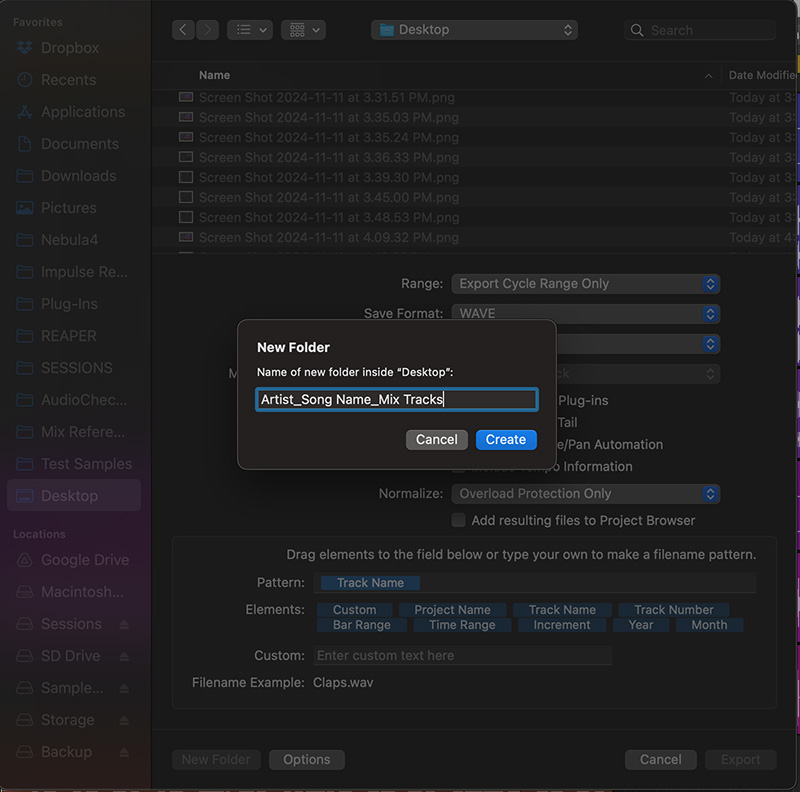
- Click the New Folder button and name it using this format: Artist_Song Name_Mix Tracks
- Copy the settings in the green square.
- Click the Export button. You should now have a new folder on your Desktop.
Step 3: In the top menu click File > Bounce > Project or Section…
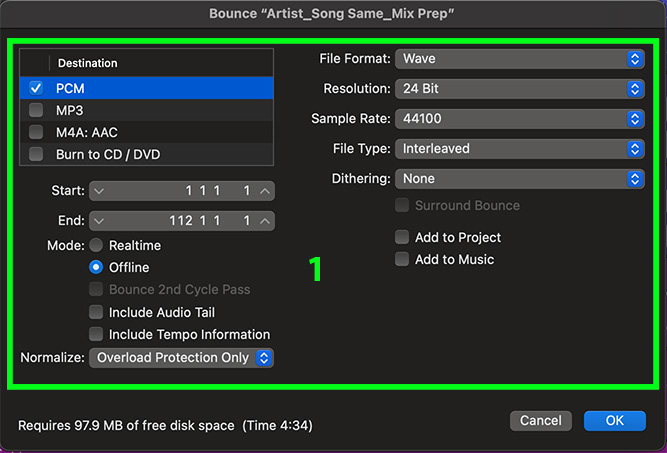
- In the popup window, copy the settings in the green square, then click OK.
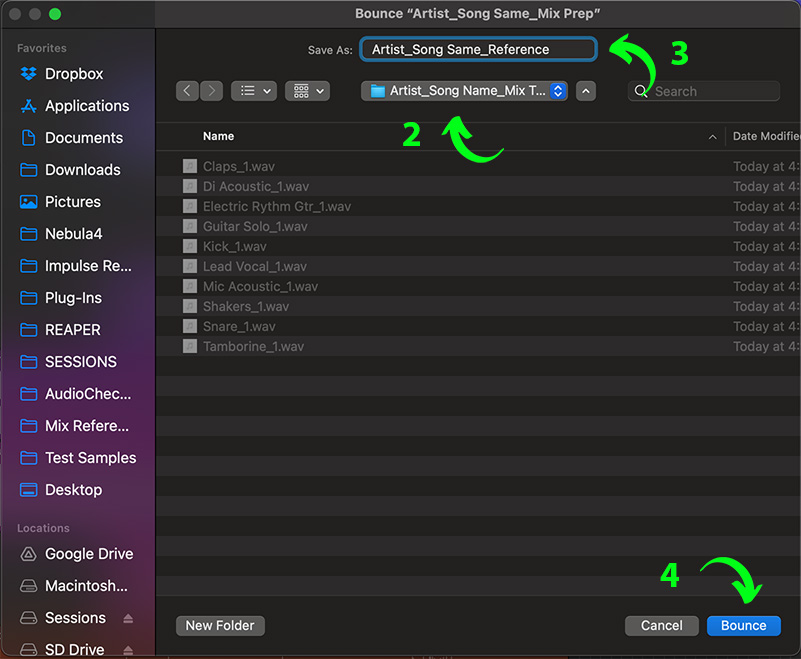
- In the next popup window, navigate to the new folder you created on the Desktop in Step 2.
- Name it using this format: Artist_Song Name_Reference
- Click the Bounce button. Your reference should now be in the folder on the Desktop.
Step 4: Zip the folder and send it
- On the Desktop, right click on the folder containing your files and click Compress.
- There should now be a Zip file on the Desktop with the same name as the folder. The Zip file is what you should send.
- The easiest way to send it is with WeTransfer.com – send to the following email address:
[email protected]
